Ezserver User Guide
Table of Contents
System requirement
System Setup
System Maintenance
Management
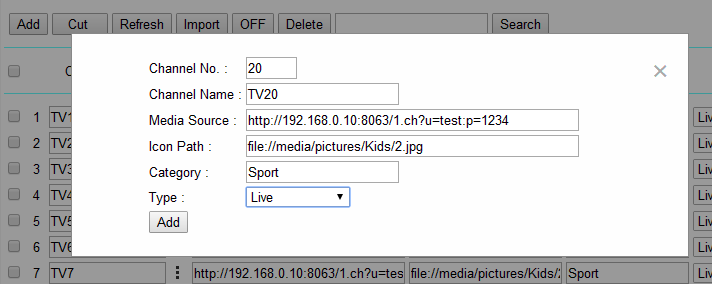
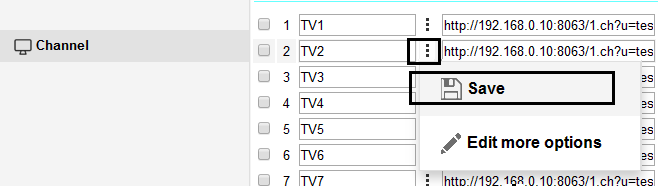
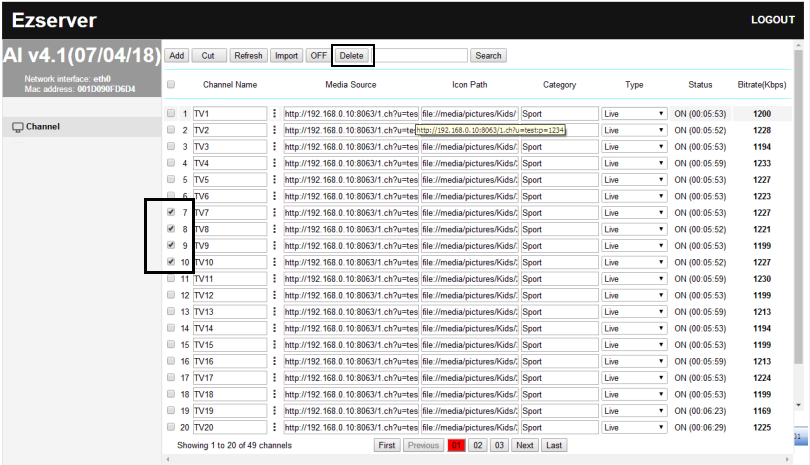
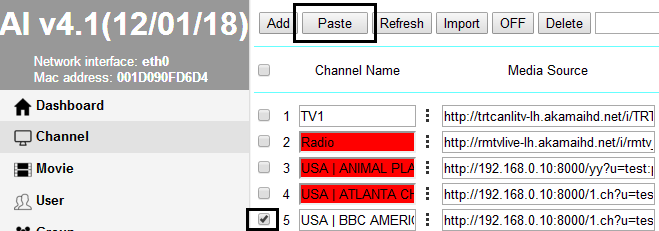
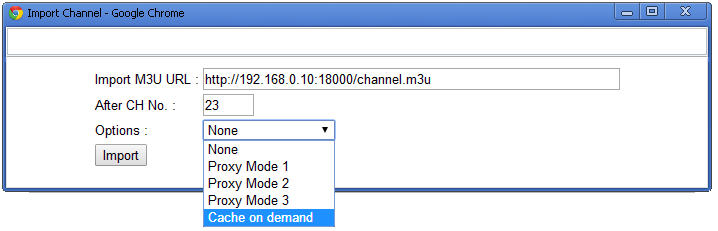
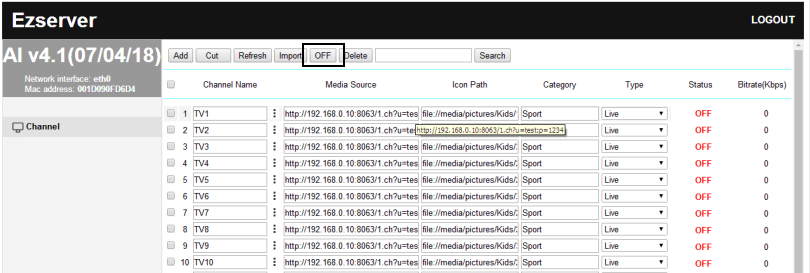
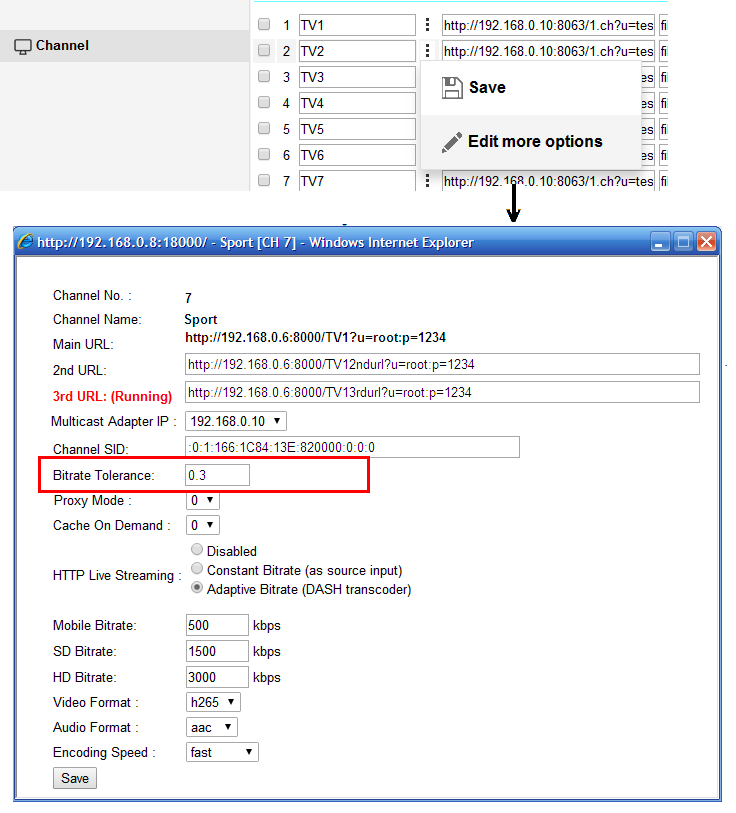
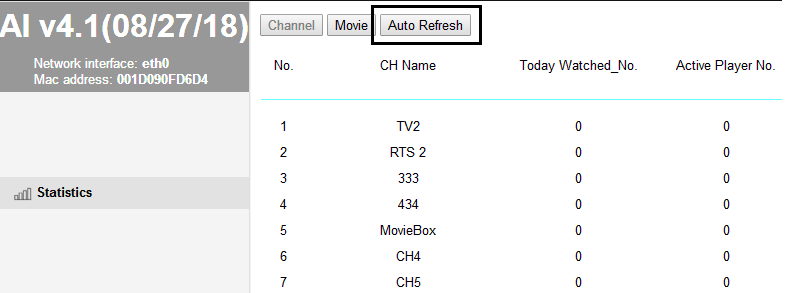
Channel
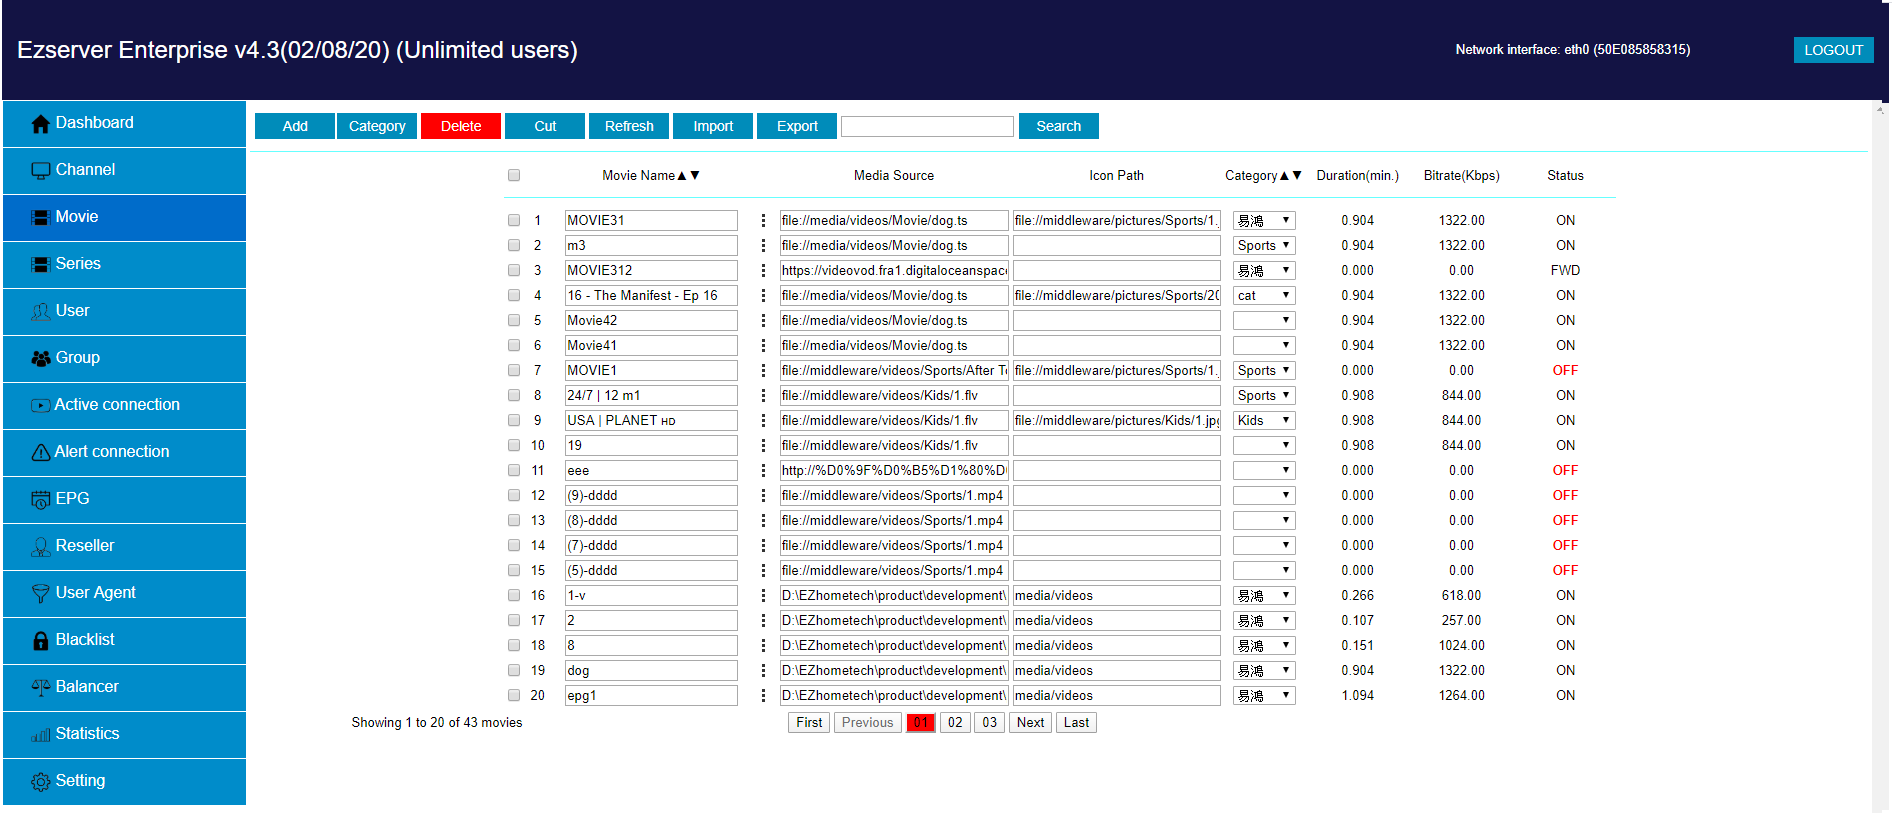
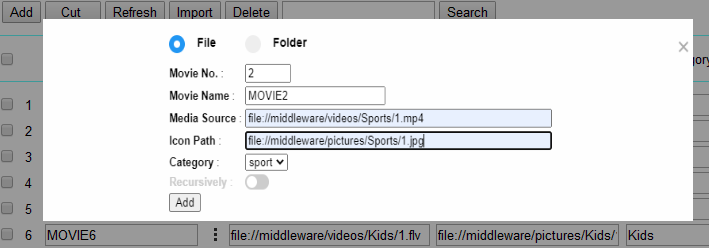
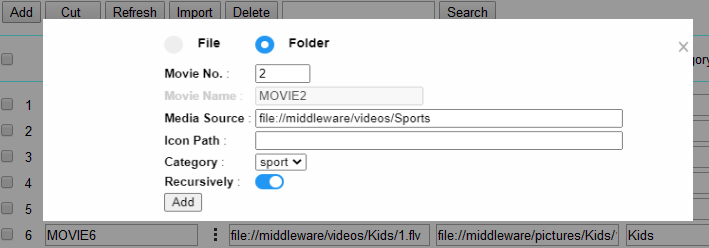
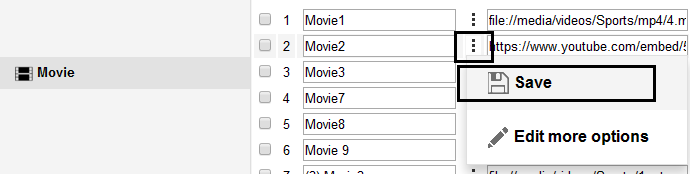
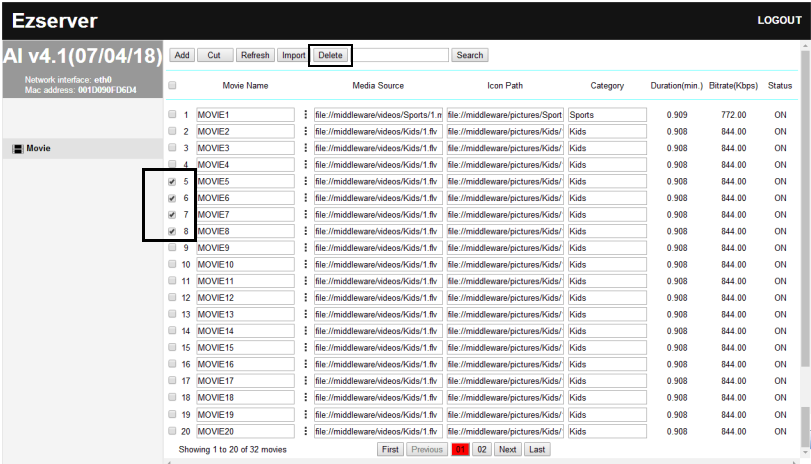
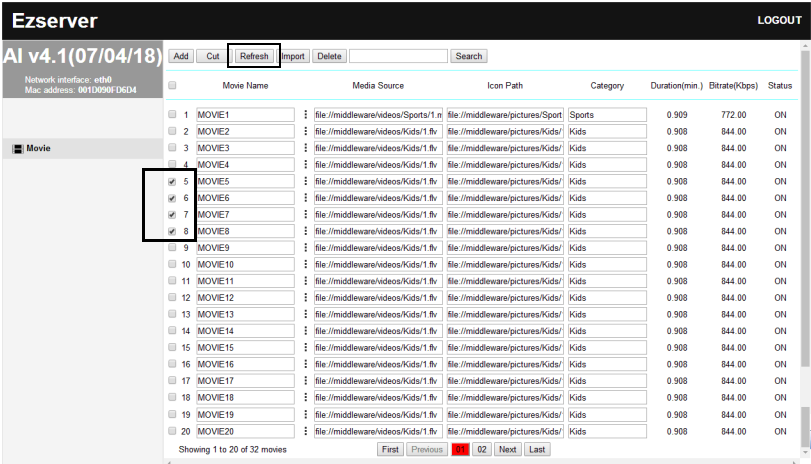
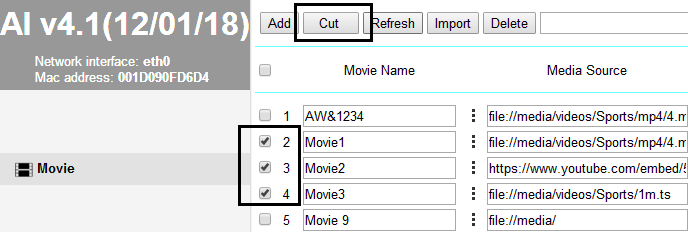
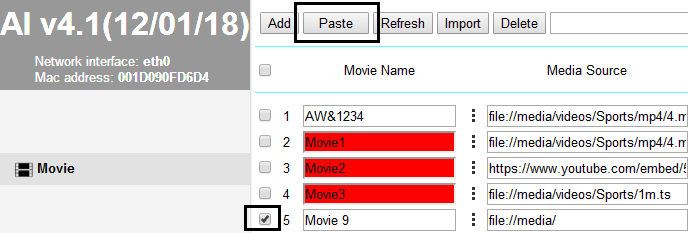
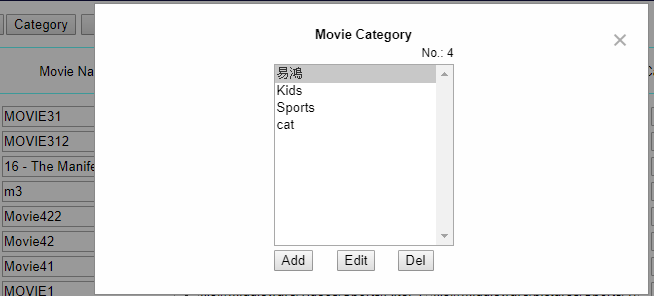
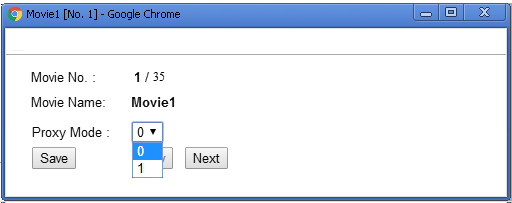
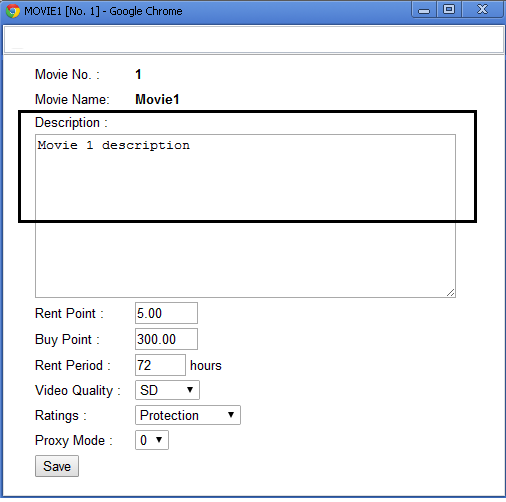
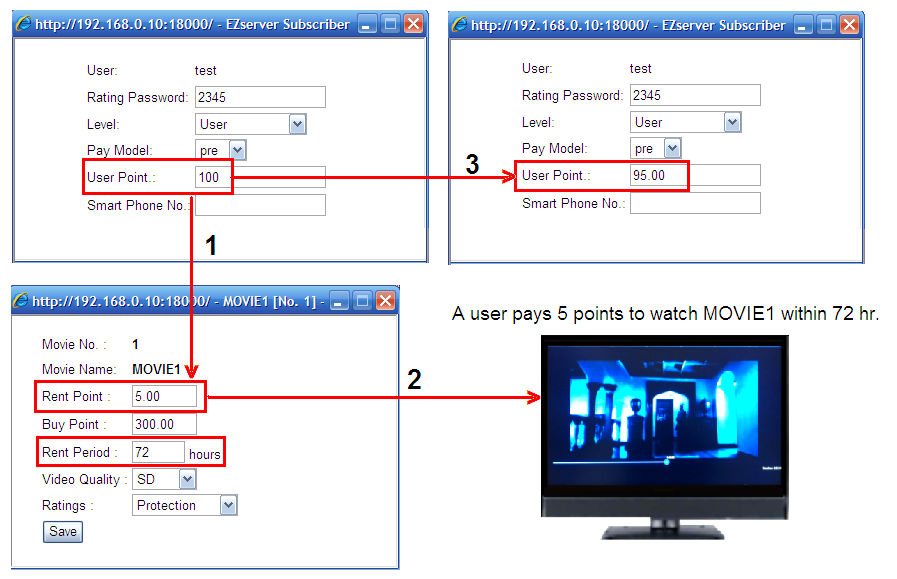
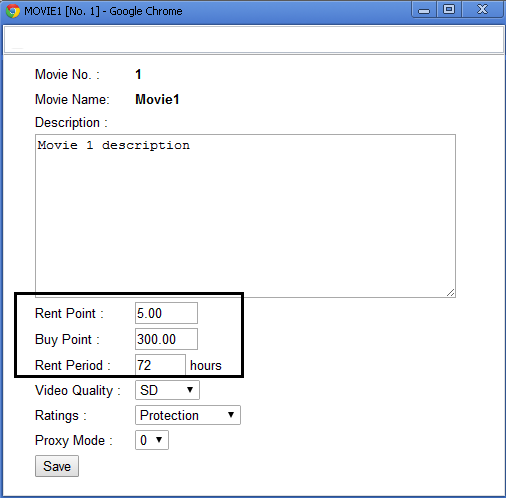
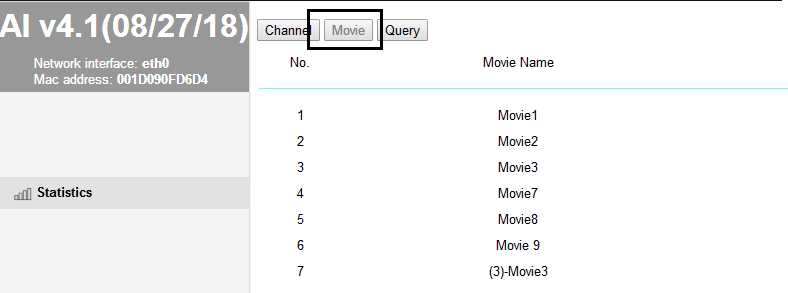
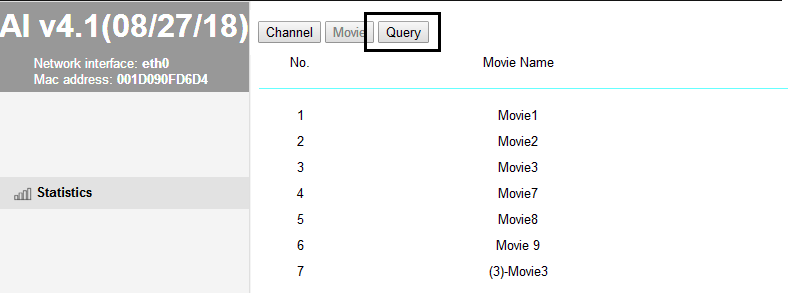
Movie
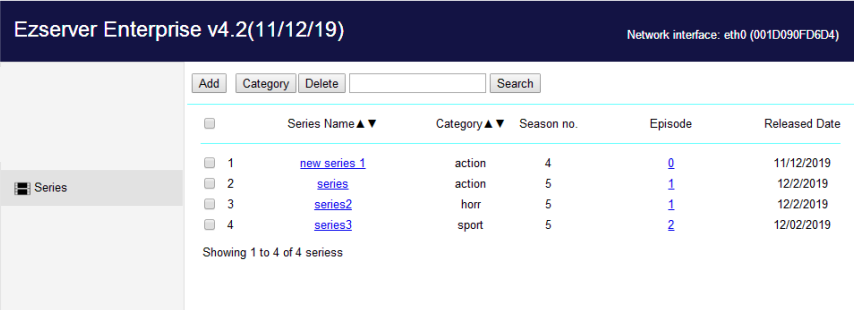
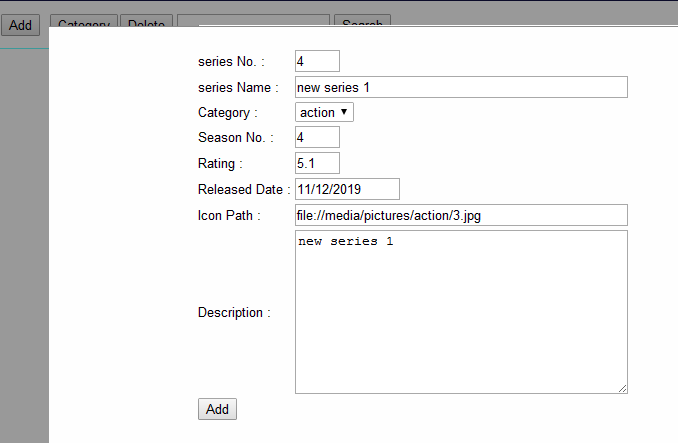
Series
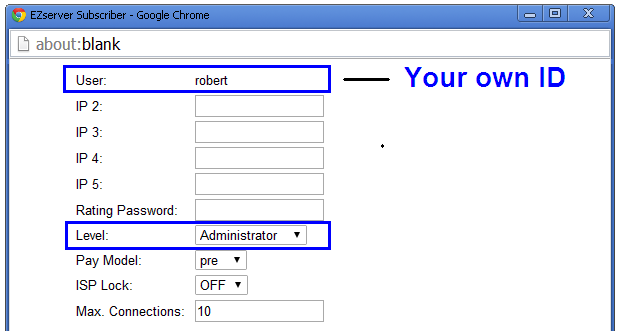
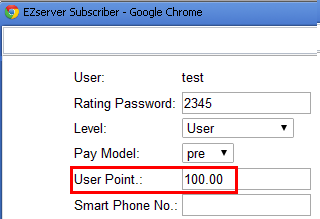
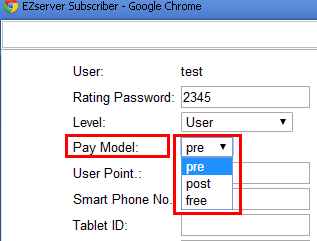
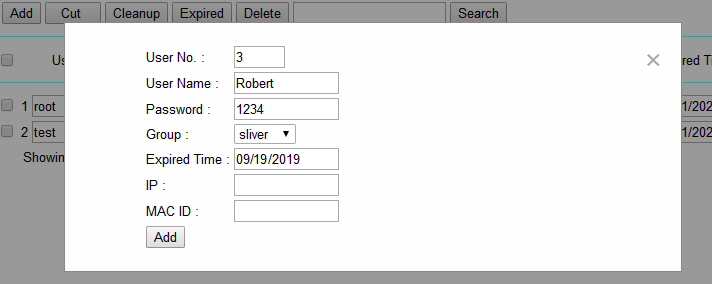
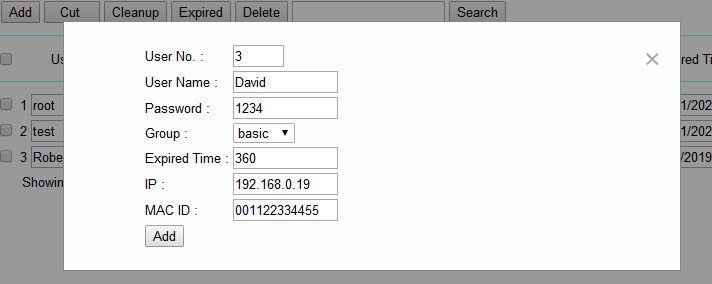
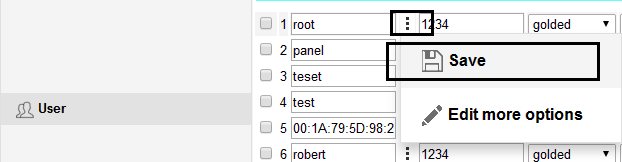
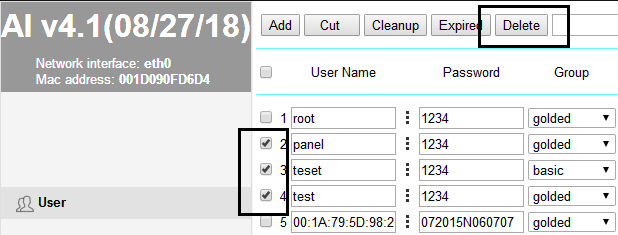
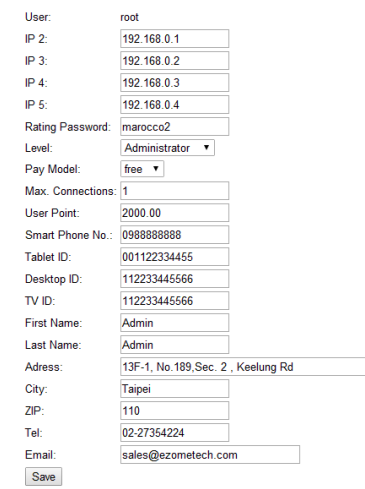
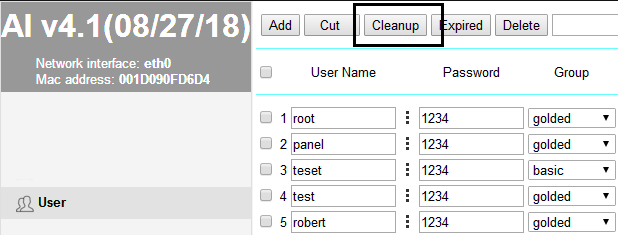
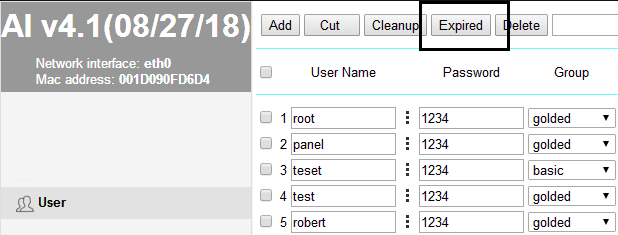
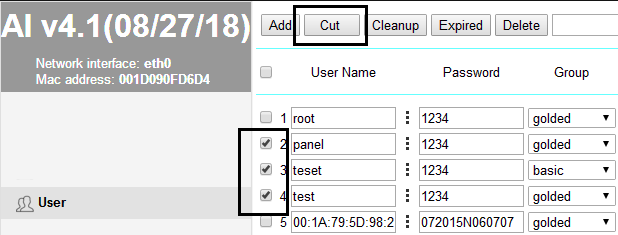
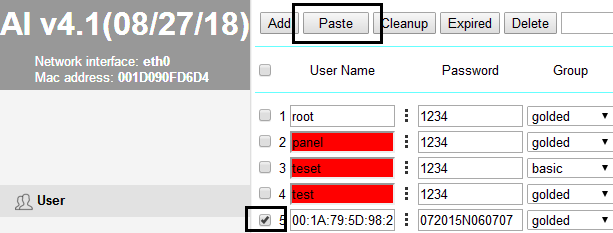
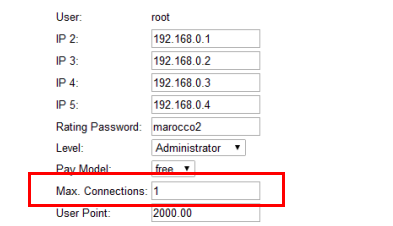
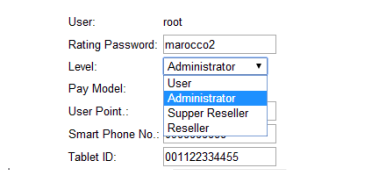
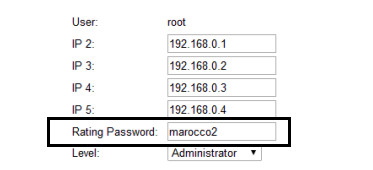
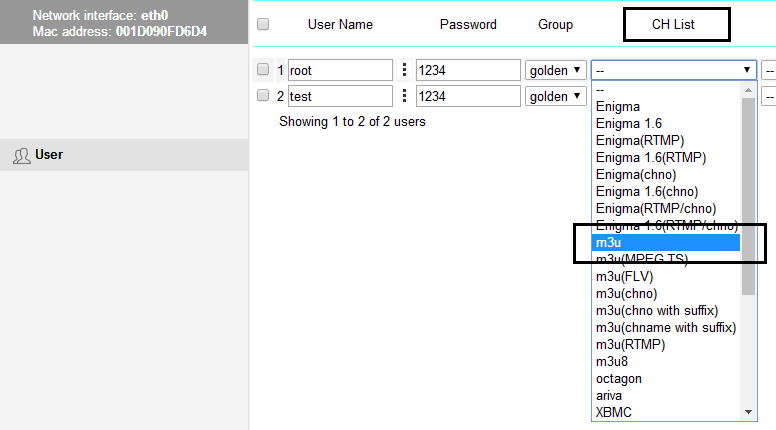
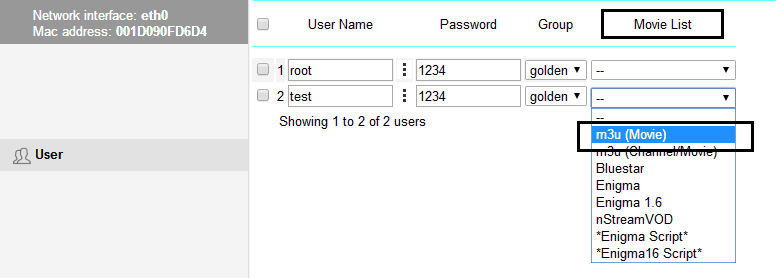
User
Group
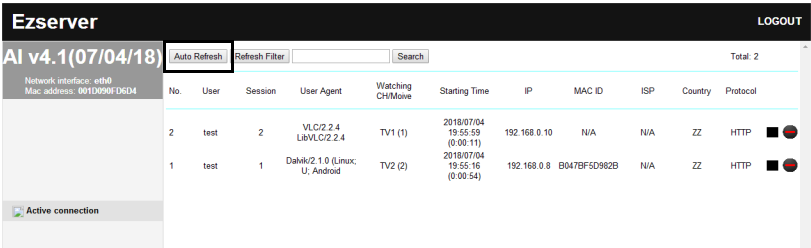
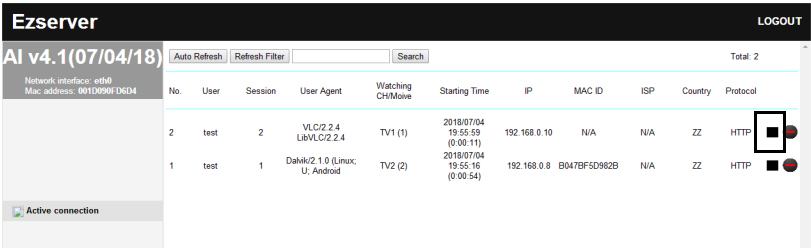
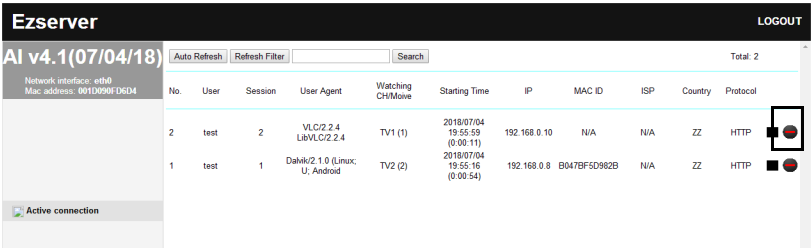
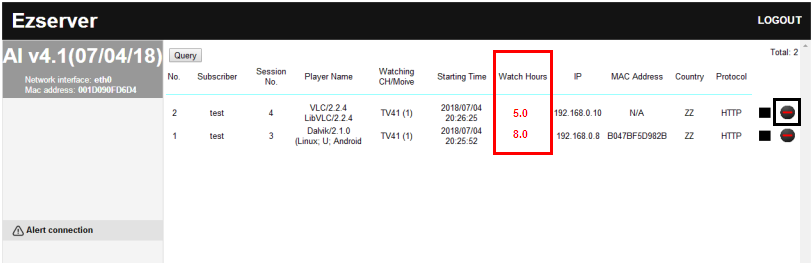
Active connection
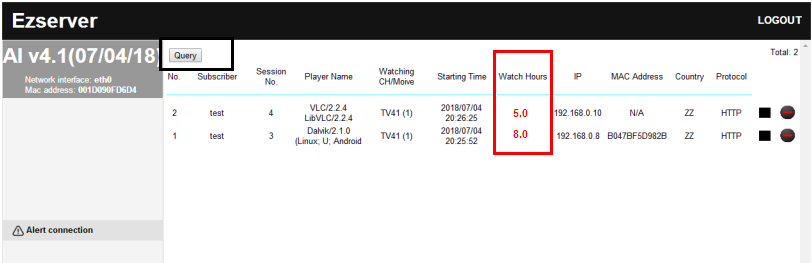
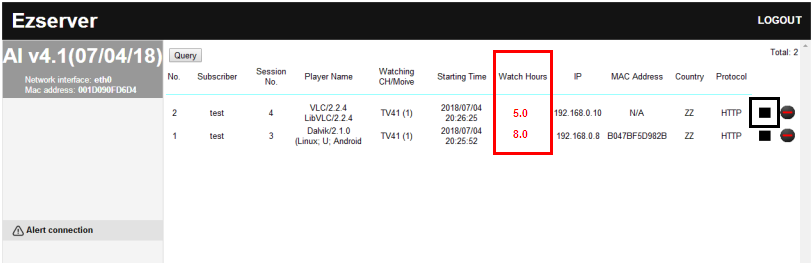
Alert connection
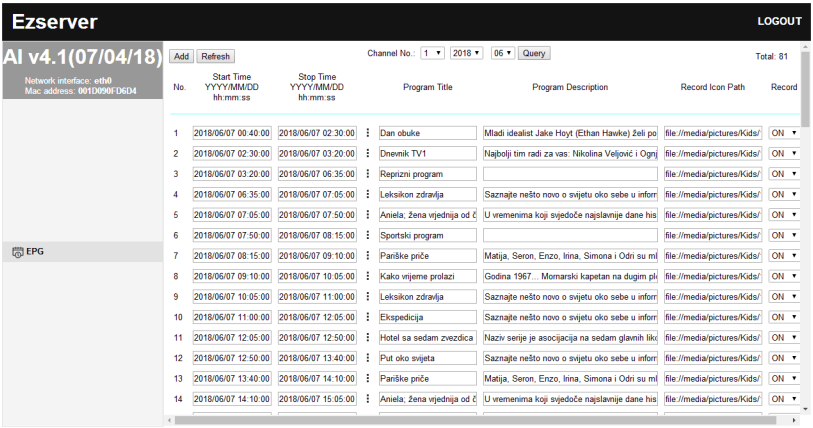
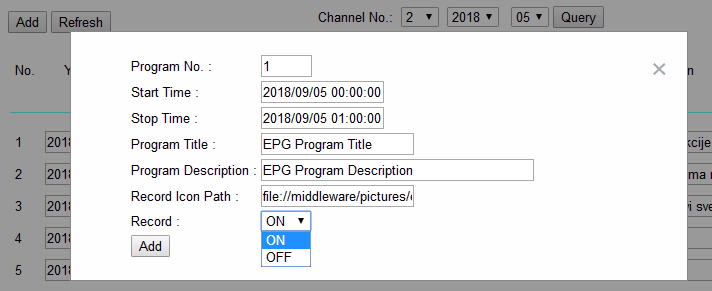
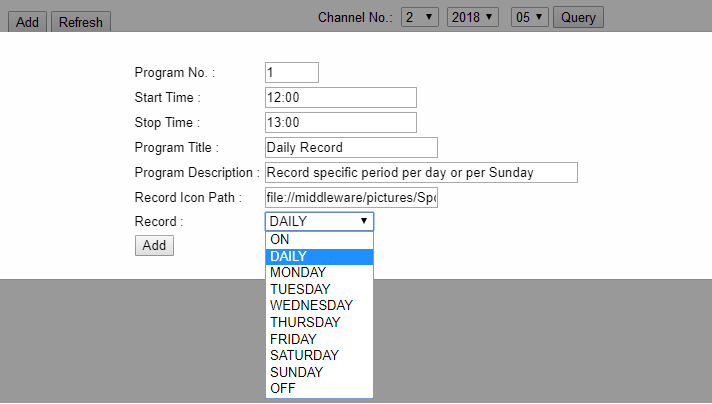
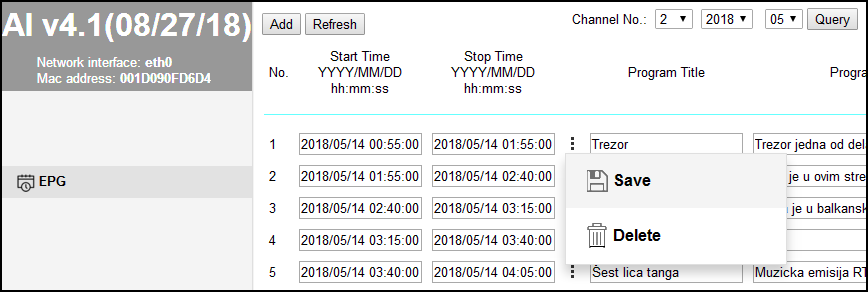
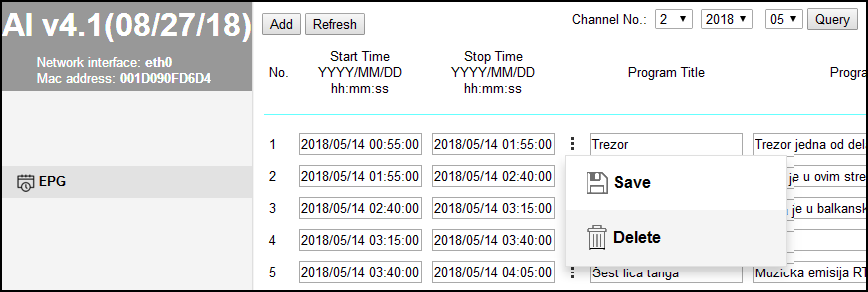
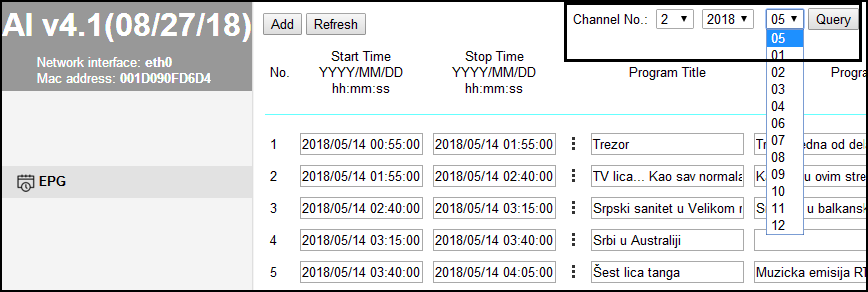
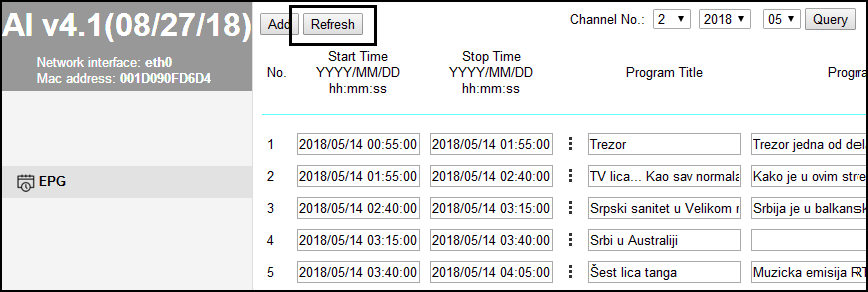
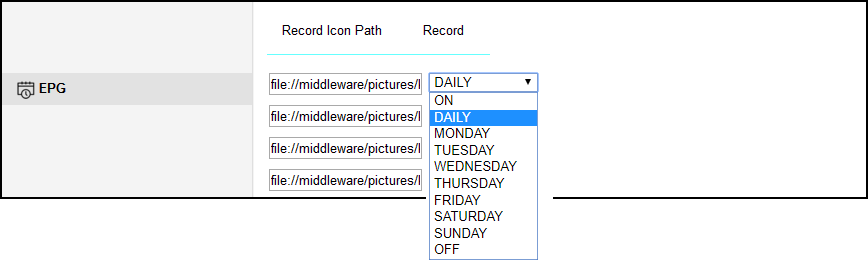
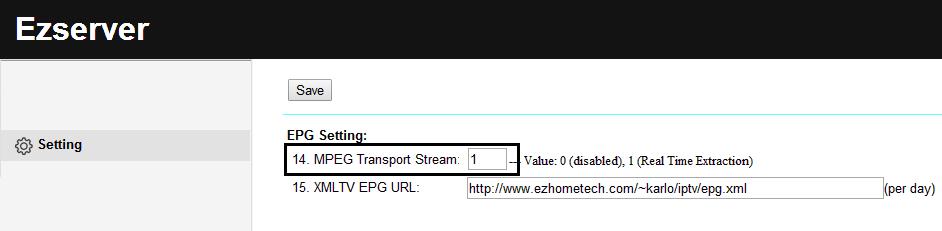
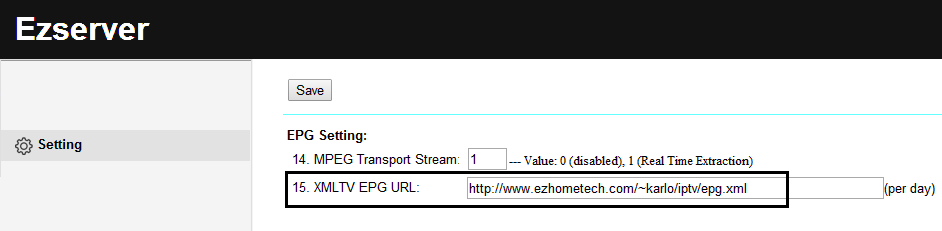
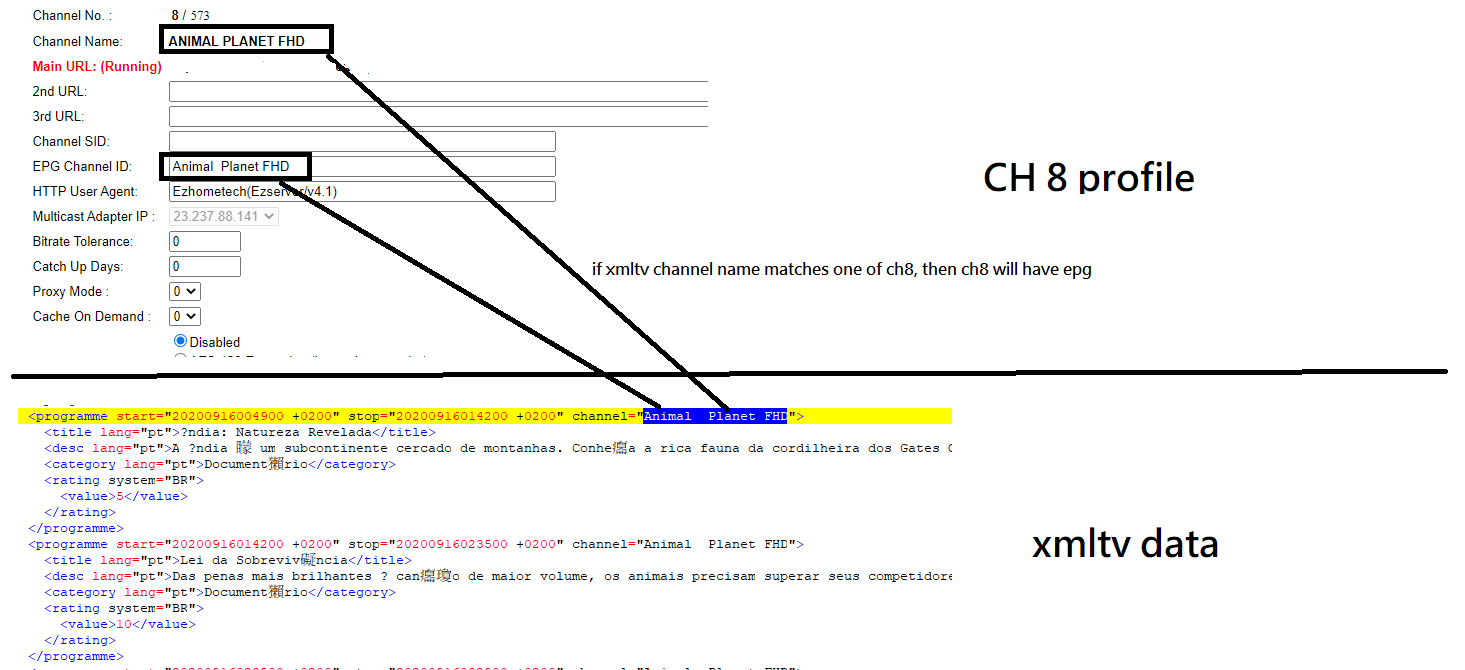
EPG
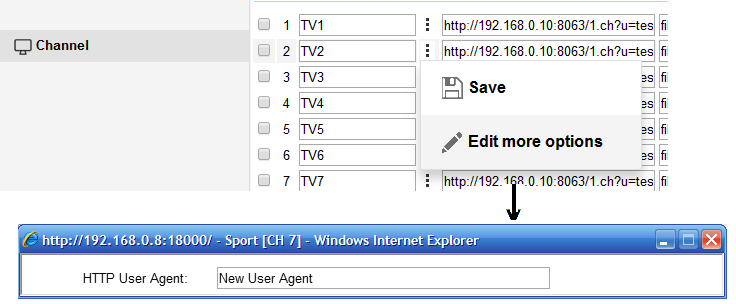
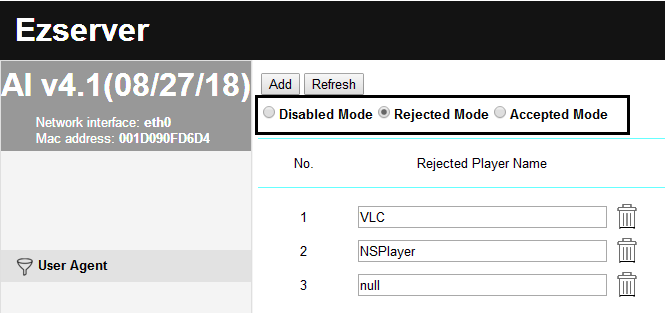
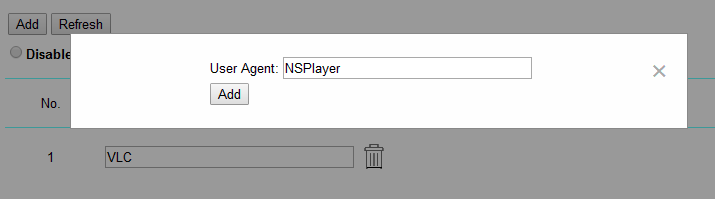
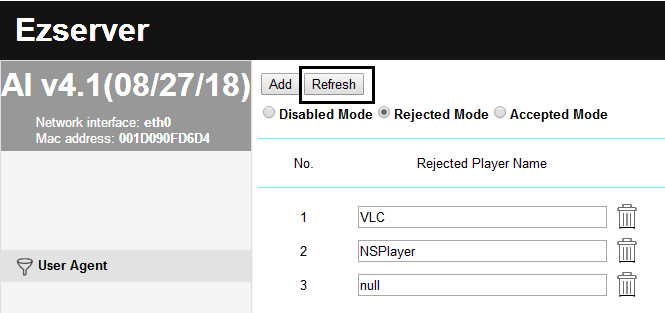
User Agent
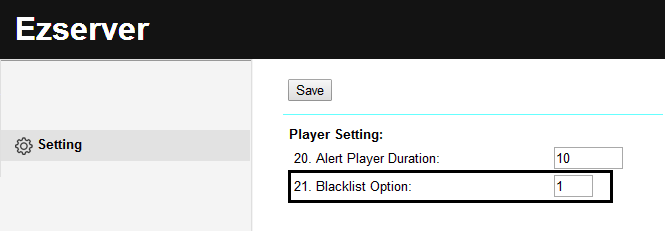
Blacklist
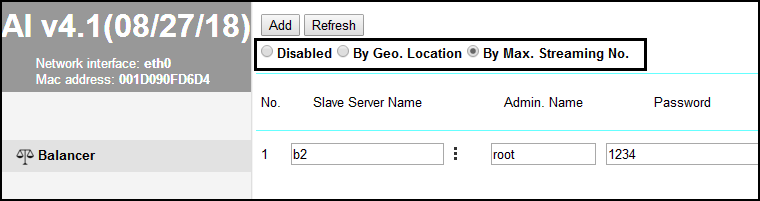
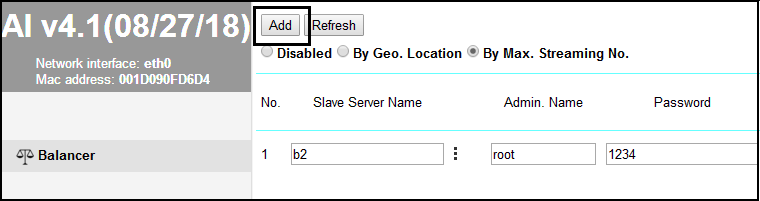
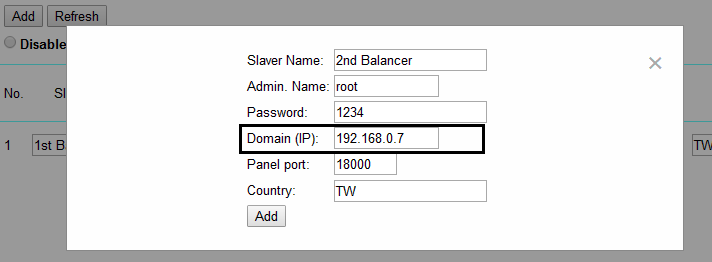
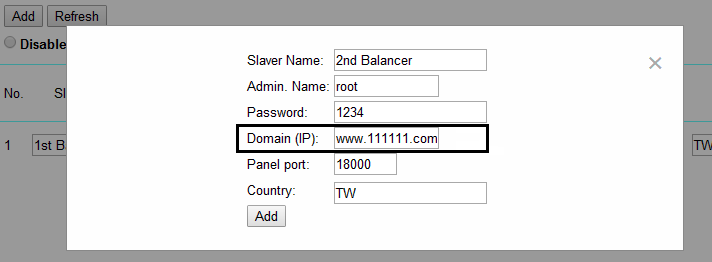
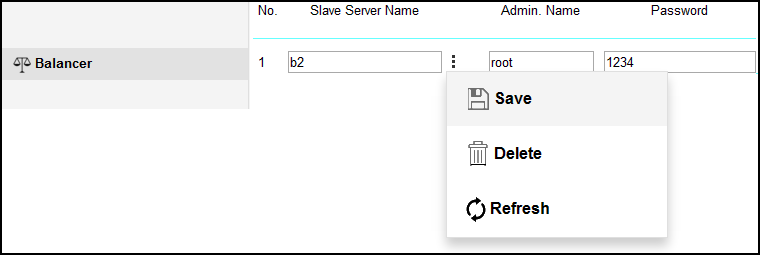
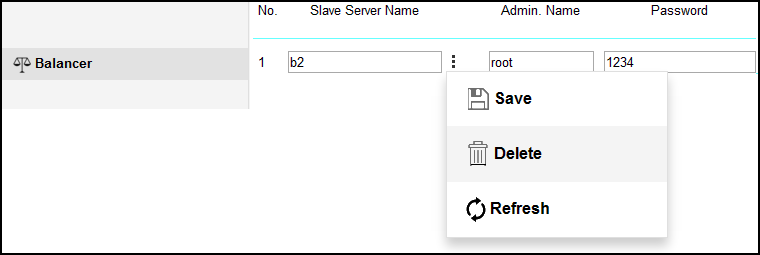
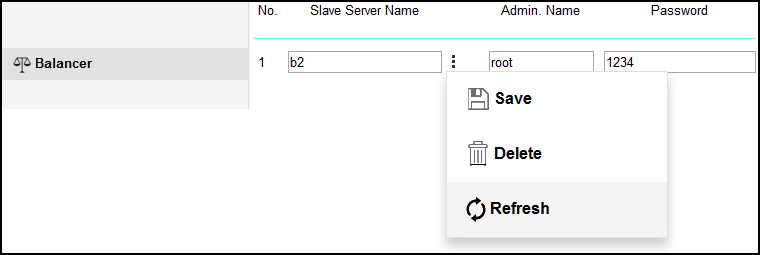
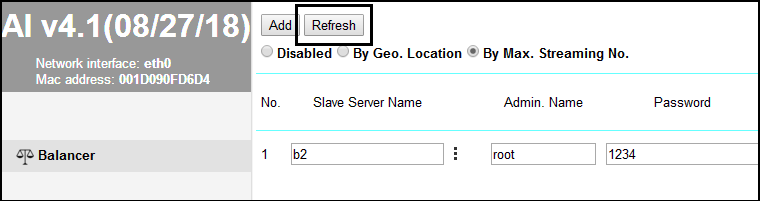
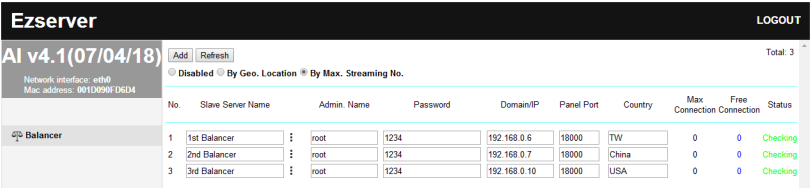
Balancer
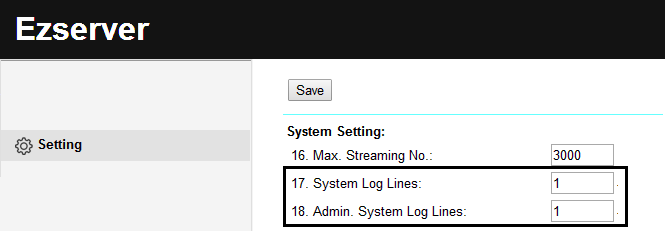
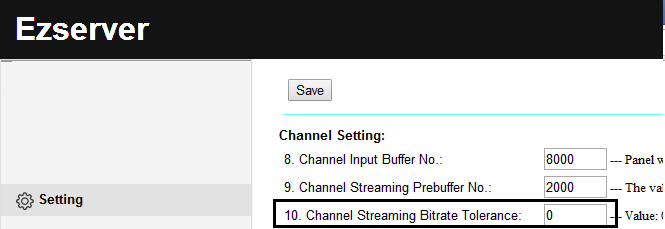
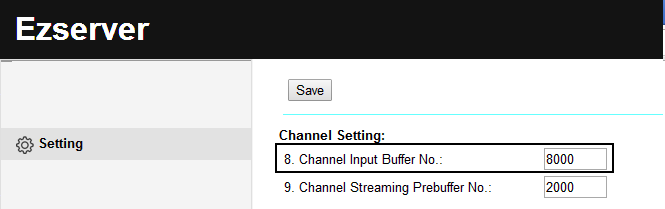
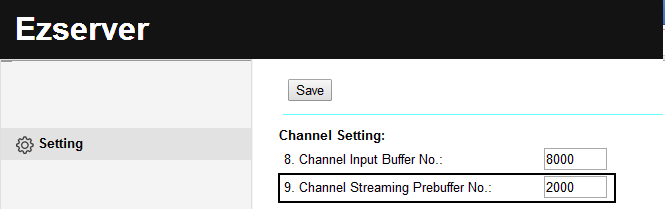
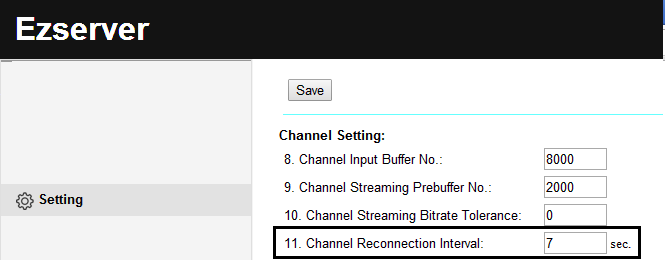
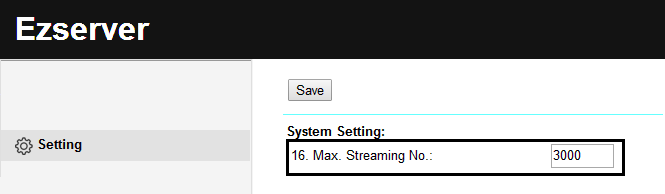
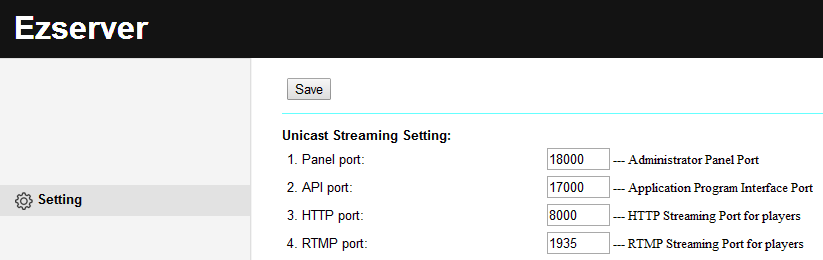
Setting
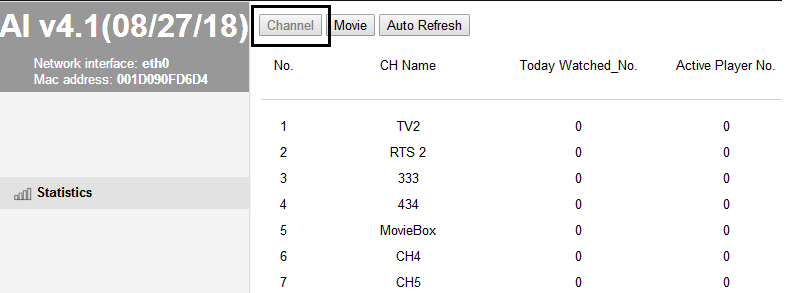
Statistics
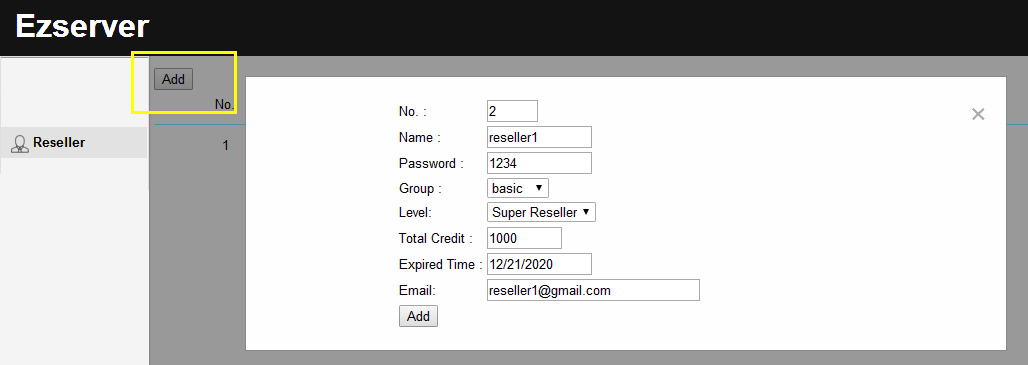
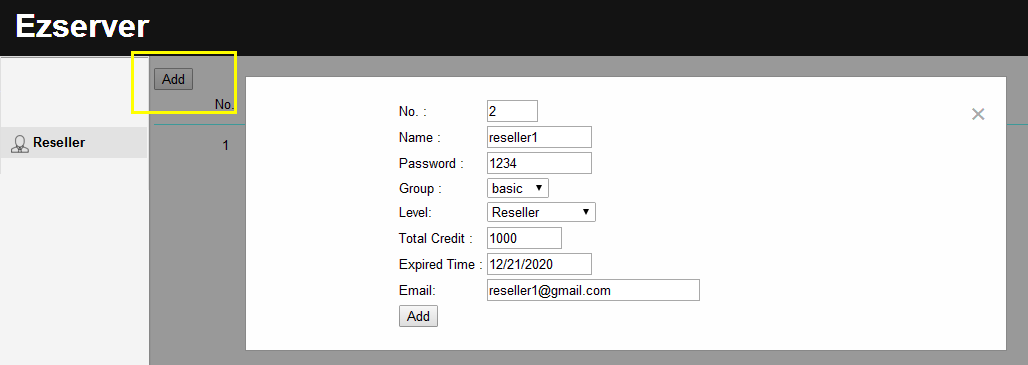
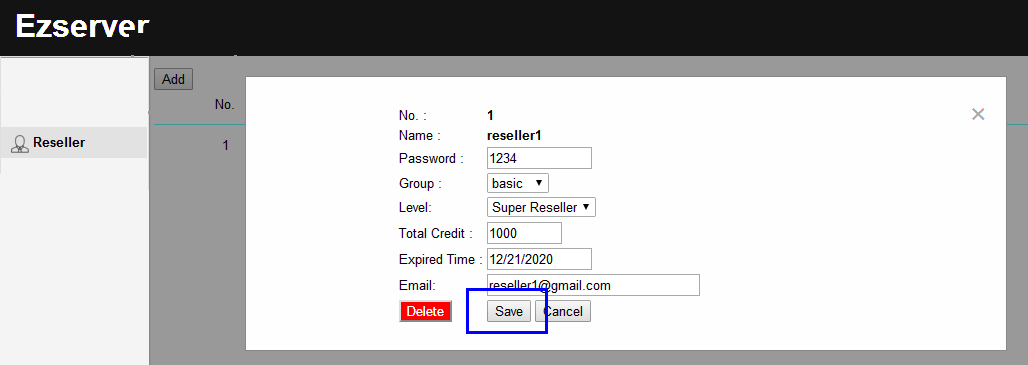
Reseller
Output link
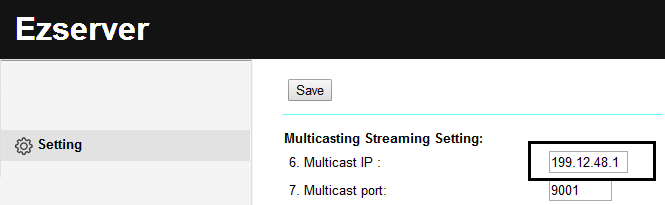
Multicast UDP
Unicast UDP
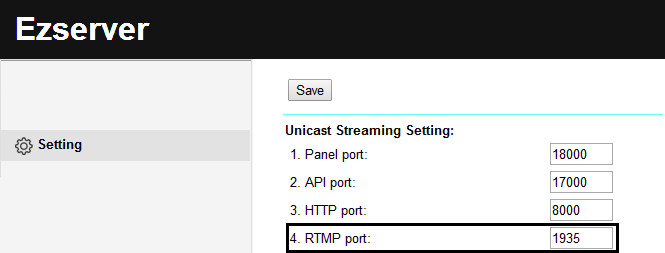
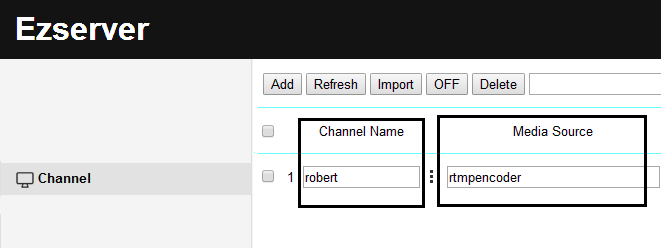
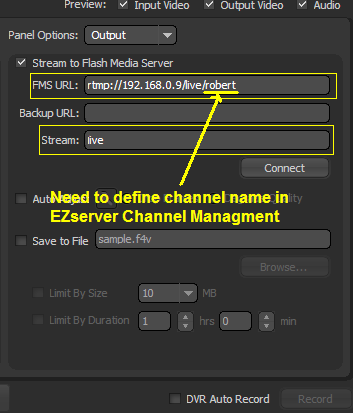
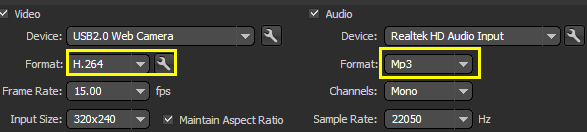
RTMP Input
Appendix A
|
Linux 64-bit platform: Debian 8, 9 (Recommended), Ubuntu 14, 16, Centos. (The below numbers of channel and players are based on network card speed, RAM size and CPU core number.)
There are 2 options for auto start mode. Option 1:
Option 2:
There are 2 options to disable start mode. Option 1:
Option 2:
There are 2 options for software update. Option 1: Get patch files. (recommended)
Option 2: Create new folder and backup the current folder.
Channel zapping with Max connection control New server installation with old server setting
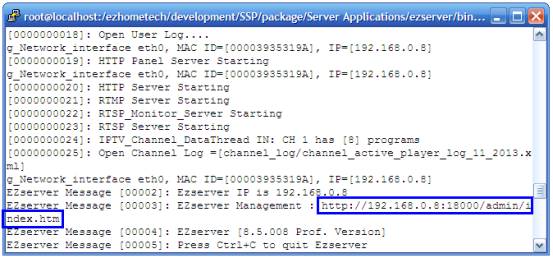
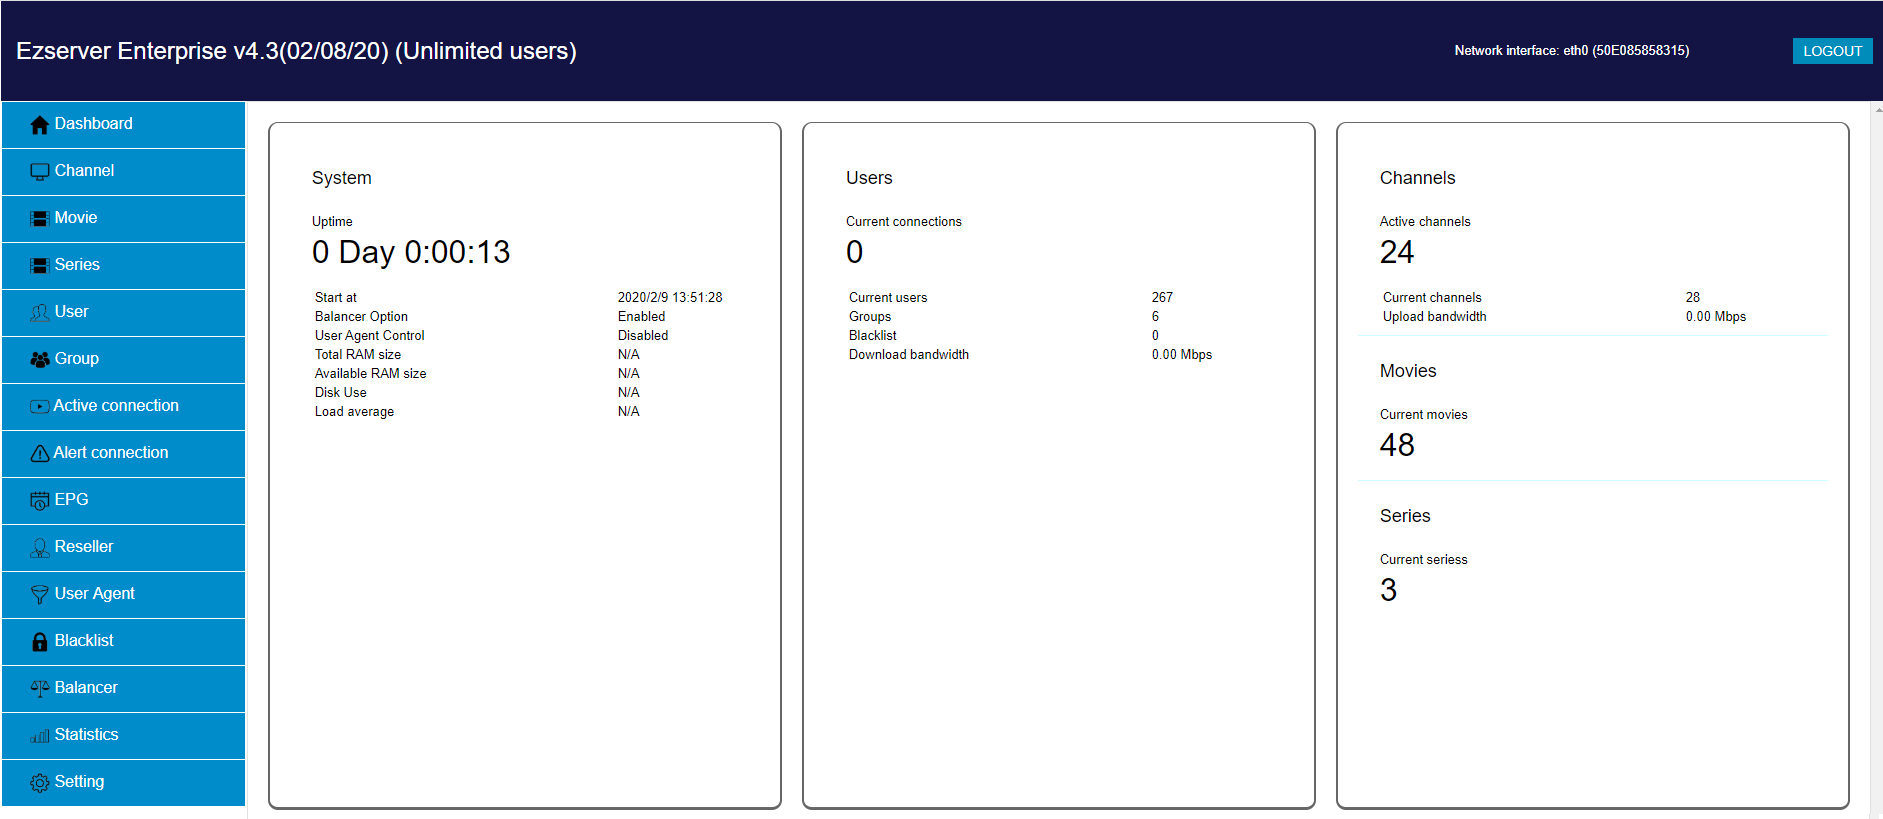
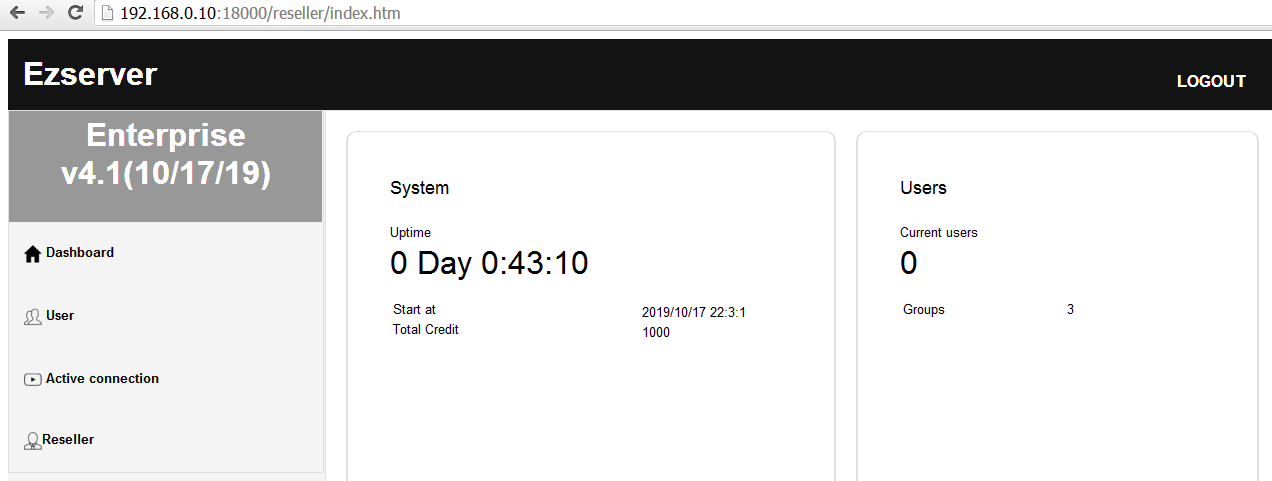
shows System, User, Channel and Movie information,
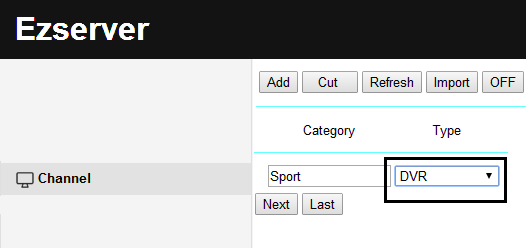
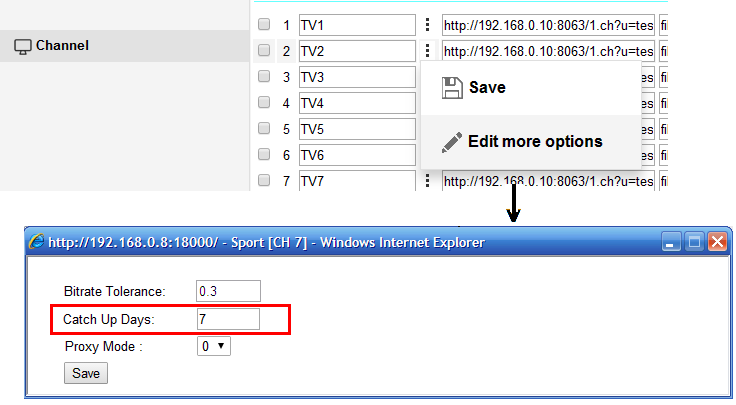
Time-Shift channel is to save live stream from source URL into server local storage. When a player wants to play it, Ezserer restreams its videos from server local storage to the player. The player can backward and forward the channel with timestamp.
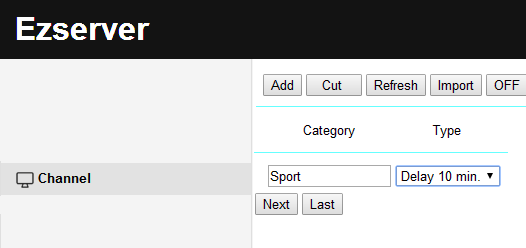
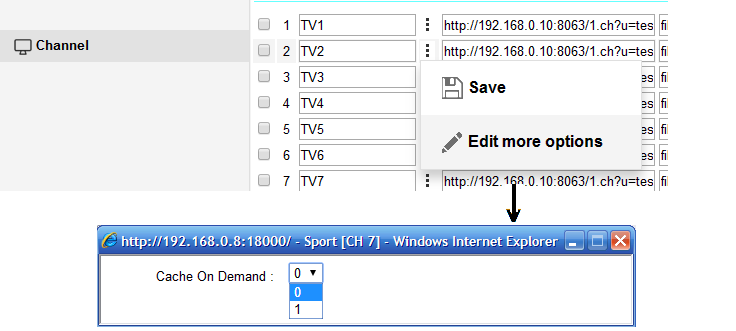
Time Delay channel is to save live stream into server local storage. Ezserver restreams recorded videos to players.
MOVIE 10 is located in /home/ezserver_enterprise/media/videos/Movie/1.ts.
Kids folder is located in /home/ezserver_enterprise/media/videos/Kids
For external movies in other servers or outside ezserver folder, you can use Linux Symbolic Link or NFS to insert them into ezserver folder.
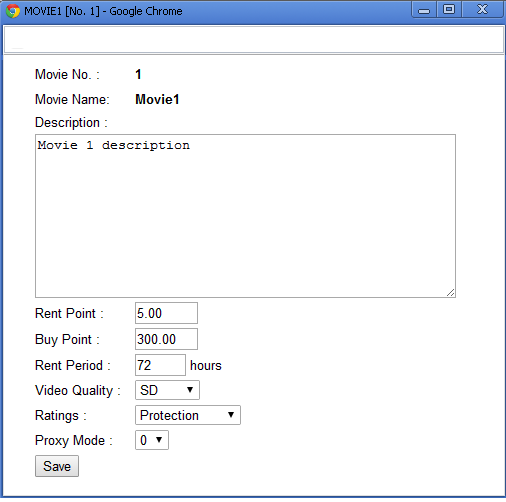
Set rating password for parent control
Stop active connection and Block IP
Stop alerted connection and Block IP
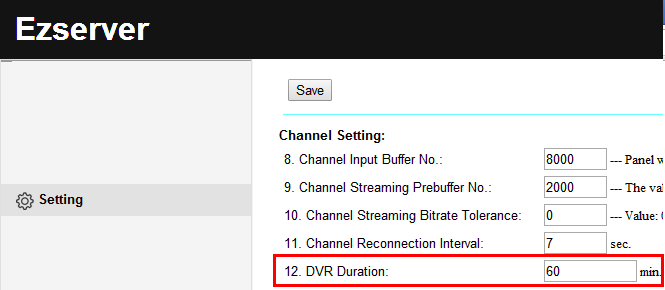
The path of recorded file is ezserver_enterprise /tv_program_archive/2018_05_14/CH0001_10_00.ts
Channel Statistic auto-refresh Query
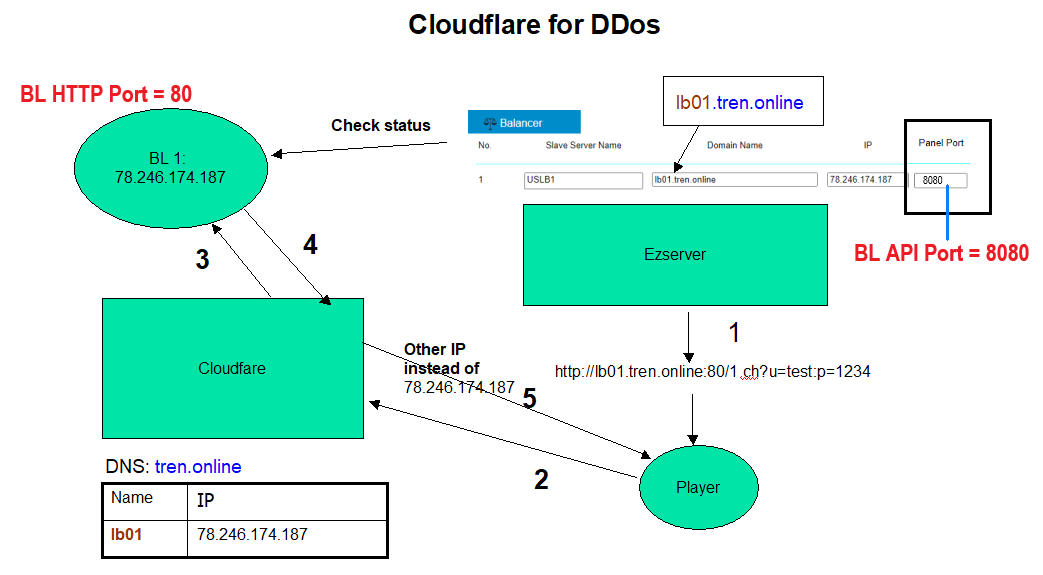
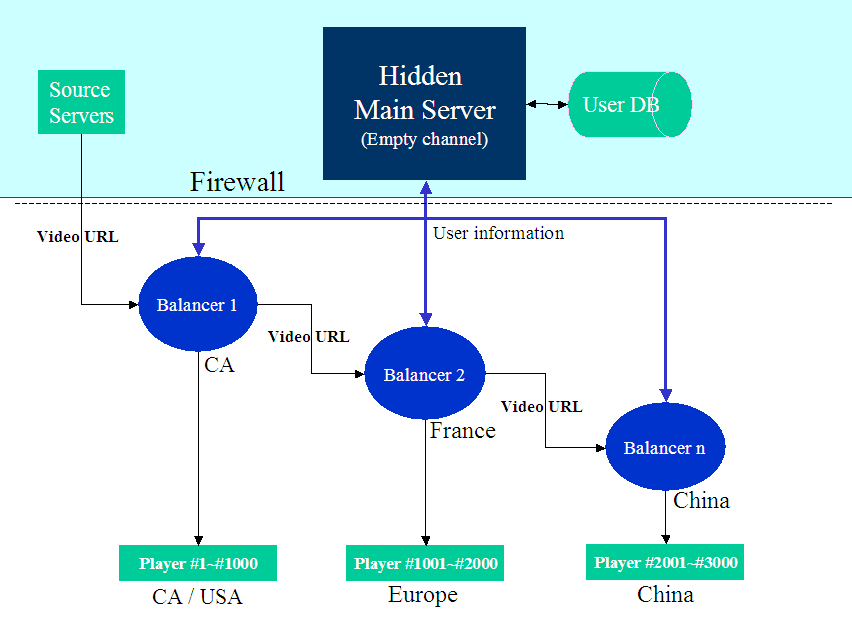
Load Balancer not only redirects the player request by Geo. Location or Max. Streaming No. of the server to slave servers, but also supports distributed users and channels.
Balancer model 1:
Balancer model 2:
Master server for balancer setting:
Balancer model 1 Configuration:
Balancer model 1 Setup Flow:
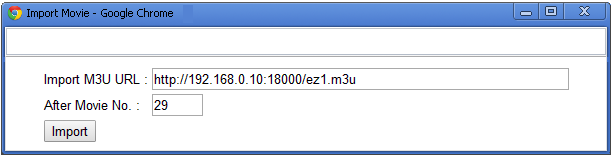
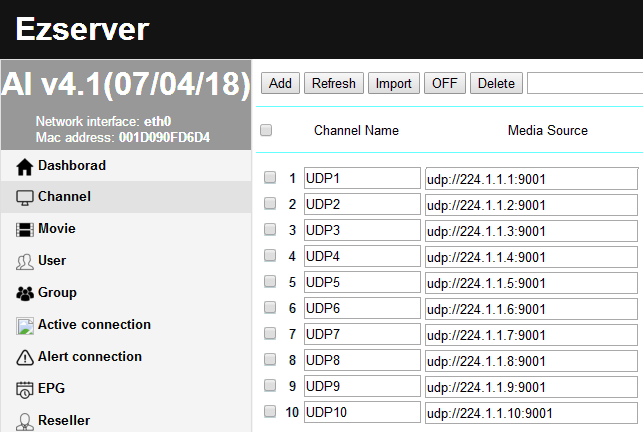
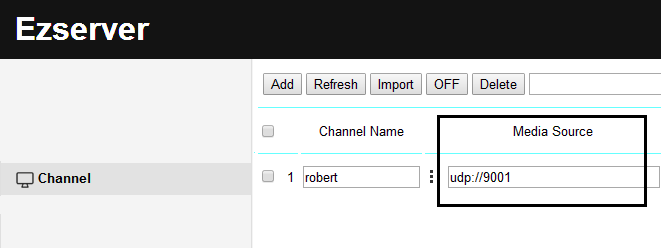
Input UDP IP and Port no. (without @) into channel Media source as below:
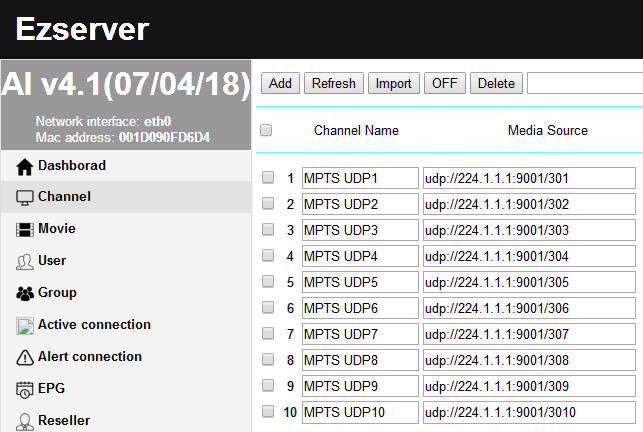
Input UDP IP, Port no. and program ID (without @) into channel Media source as below:
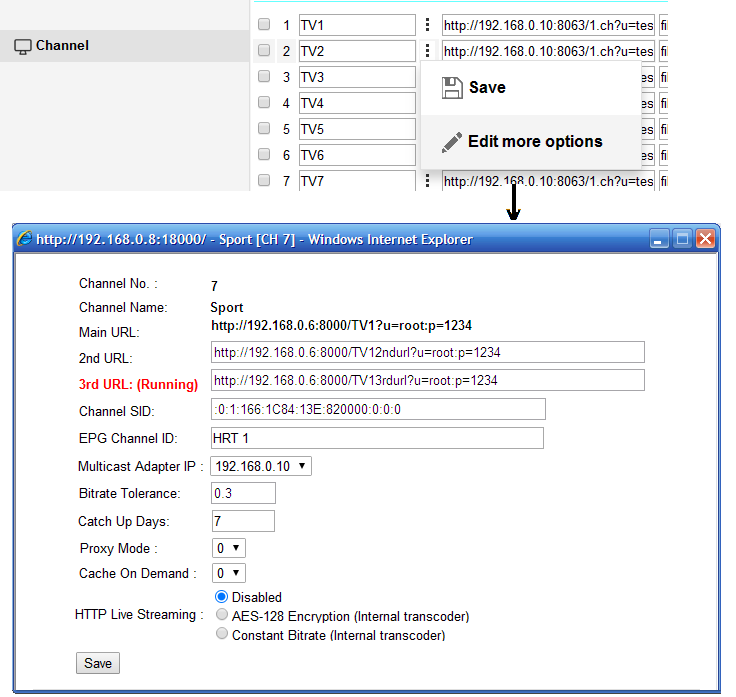
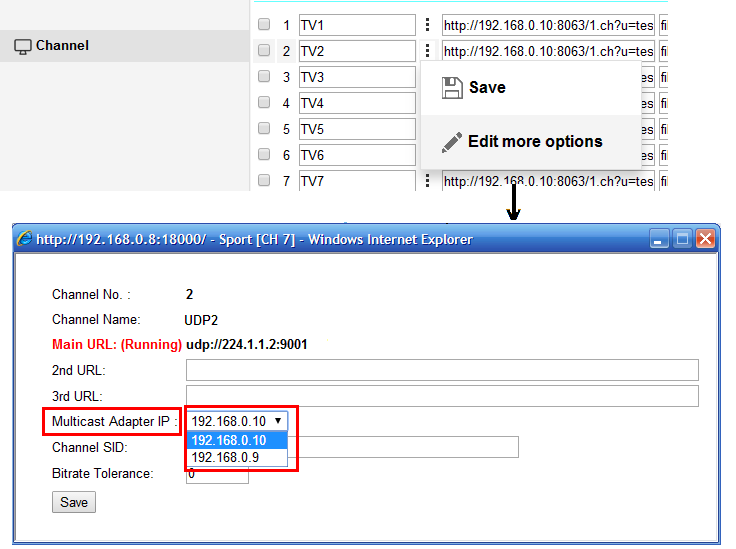
Add the 2nd network card into a server and click more option of a channel to select the 2nd card for input as below.:
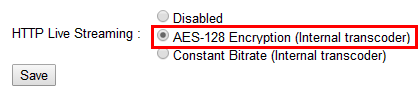
Multicast AES-128 encryption output
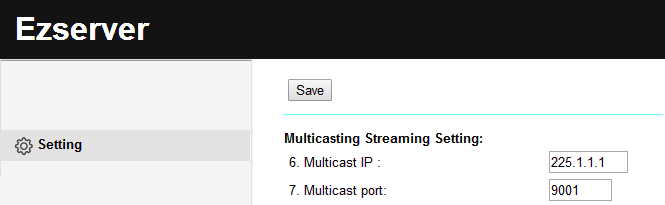
If you server has two network cards, the 1st card is for internet input link and the 2nd card is multicast output, You can add multicast_output_ip option into ezserver_config.txt to assign stream output to the 2nd network card. 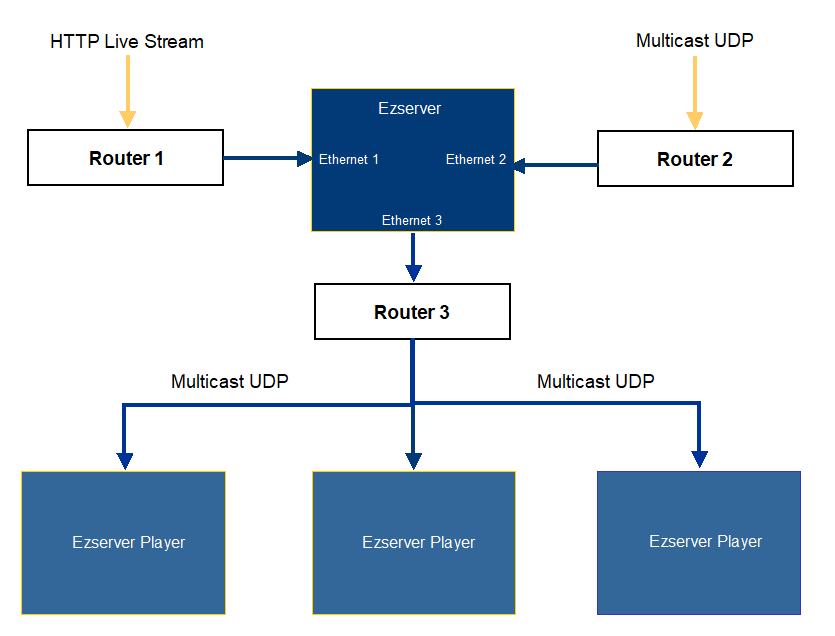
|